Hey there!
In my second ray tracing assignment, I have done some performance improvements (reduced the amount of memory used by using pointers, and defined thread count as a macro and also incremented it to 8, the core count of my CPU) and also implemented the following capabilities to my ray tracer:
- Bounding Volume Hierarcy (BVH)
- Multisample Anti-Aliasing (MSAA)
- Transparency (Reflection + Refraction)
In this part of my adventures on tracing rays, I will write about how I implemented those capabilities, what difficulties I had experienced, and how I solved them.
Bounding Volume Hierarcy (BVH)
Building the BVH
While reading the scene from the input file, I have gathered all Triangle and Sphere shapes into a vector, which is defined as std::vector<Shape *>, so that I could use Axis-Aligned Bounding Box for my BVH implementation.
I have then used the ordering technique my professor presented us in the lecture, by choosing 1 axis (X, Y, Z) at each level of the BVH tree, and splitting the vector elements whether they will lie in the left sub BVH, or the right one, according to the chosen axis.
The difficulty I experienced here was a case that 2 triangles were left to be split, but they always lied in the same side of the split decision. Even the algorithm splits the bounding cube by using X, Y, or Z axes at each iteration, the triangles were always lying at the same side, so, couldn’t be split at all (I am using the center points of the shapes to decide which side the shape belongs to). This issue had been causing my BVH building procedure to go into a tree building recursion of infinite length; so, everytime I launch my ray tracer, I would get segmentation fault.
After consulting to my professor and getting the advice, I manually split the shape vector into two in the case when no shapes move to the other side during the ordering iterations until the end; or all of the shapes move to the other side (meaning that either the left or the right tree would have 0 leaf shapes at the end of the ordering procedure). By splitting the vector of shapes into two manually, the algorithm now runs perfectly and builds the BVH of the scene right after the shapes are read, successfully.
BVH Intersection Test
In my implementation, meshes themselves do not have their own BVH, but the scene has 1 main root BVH that includes all the shapes in the scene. At the leaf nodes, it has the shapes themselves as nodes. All the ray intersection tests are done by testing the ray with this root node, then the ray is sent to the left & right nodes if the ray intersects the root’s BBox, recursively.
The shapes at leaf levels (Triangles and Spheres) have the same intersection function implemented, so when the leaf is reached, the shape’s intersection function is triggered, and the closest intersection result of all the leafs of the tree is returned.
BVH Performance Throughput
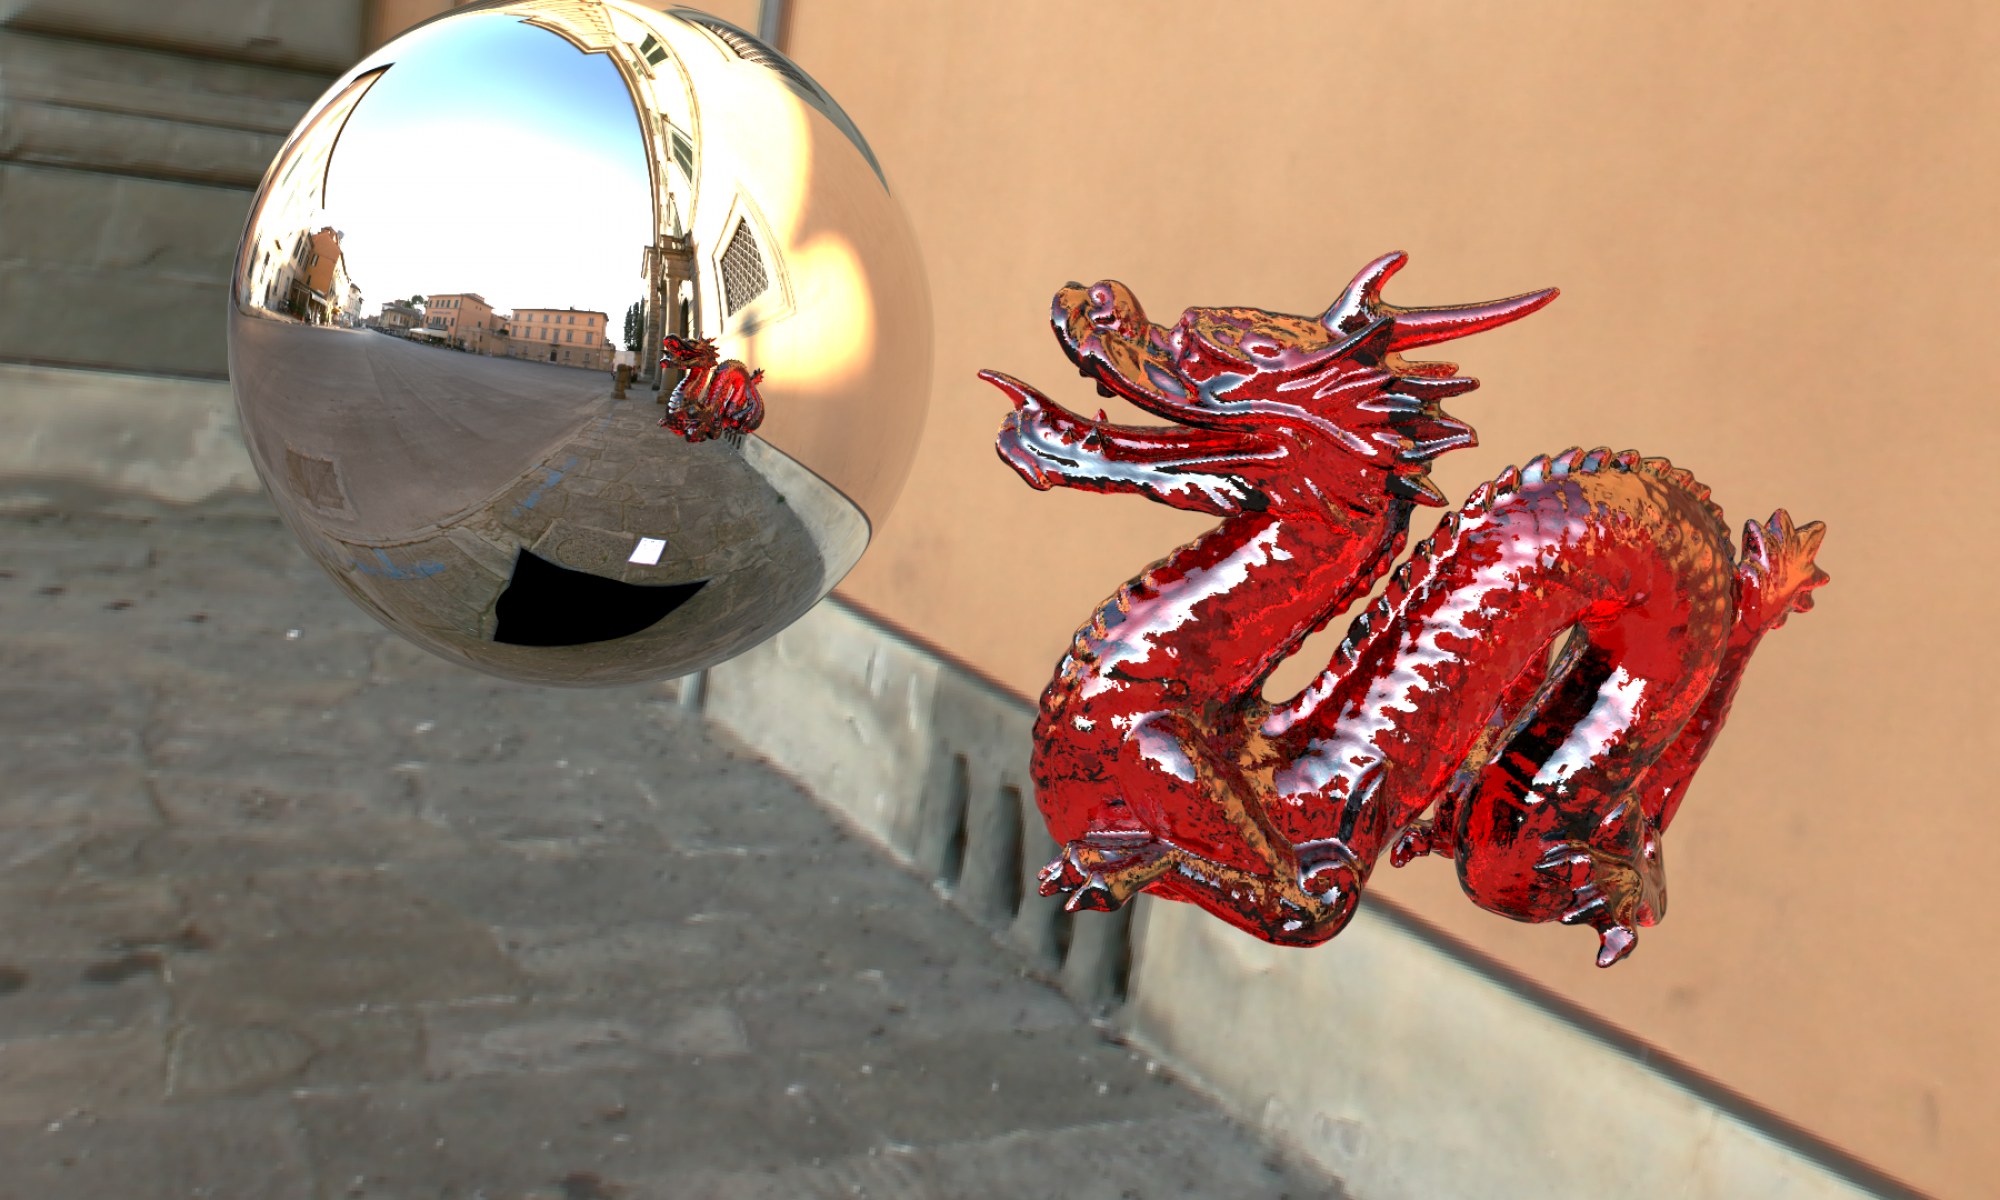
Implementing BVH is a must to be able to handle the scenes with too many triangles or spheres, as it prevents the unnecessary ray-shape intersection tests perfectly. Below is a scene that has a dragon mesh consisting of nearly 871.000 triangles. Rendering this scene without using BVH would be a suicide attempt, but with BVH, the scene gets rendered in only ~2.5 seconds.

chinese_dragon.xml
(800x800)
2.598 seconds (/w 8 threads, no MSAA)
Multisample Anti-Aliasing (MSAA)
The way I have implemented the multisampling capability is provided in the picture below:
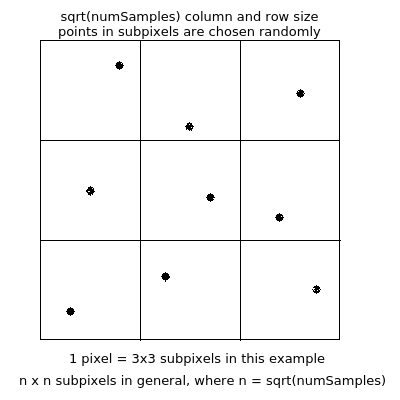
After sending numSamples (provided in the scene xml file) rays, I get the average of their resulting colors, and set that averaged value as the color of the pixel (in the image, the pixel is the whole 3×3 area). I treat the subpixels equally, meaning that they all have the same weight. This method could be improved by using Gaussian distribution to weight the subpixels according to their distances to the center subpixel, in which case the center subpixel would have the highest weight.
Below is a GIF file that demonstrates the benefits of enabling MSAA and increasing the MSAA sample count:
As seen in the GIF file above, implementing MSAA have considerably increased the visual performance of the same scene by smoothing the noisy pixels.
Transparency (Reflection + Refraction)
Transparency is used to mimic transparent objects (such as glass, water, etc.) in ray tracing. It consists of two parts: Reflection & Refraction.
When a ray hits a transparent object, some of the ray’s energy gets reflected, and the remaining gets refracted inside the object. The color of that pixel comes from the sum of that reflection and refraction colors.
Before starting the implementation of transparency, I have studied my lecture notes and also this stratchapixel.com post, together with the Reflections and Refractions in Ray Tracing article, and the related section of Fundamentals of Computer Graphics book.
After implementing transparency by using Schlick’s approximation to decide the ratio of reflected color & refracted color, I was able to render the glass spheres very well, as can be seen in the image below:
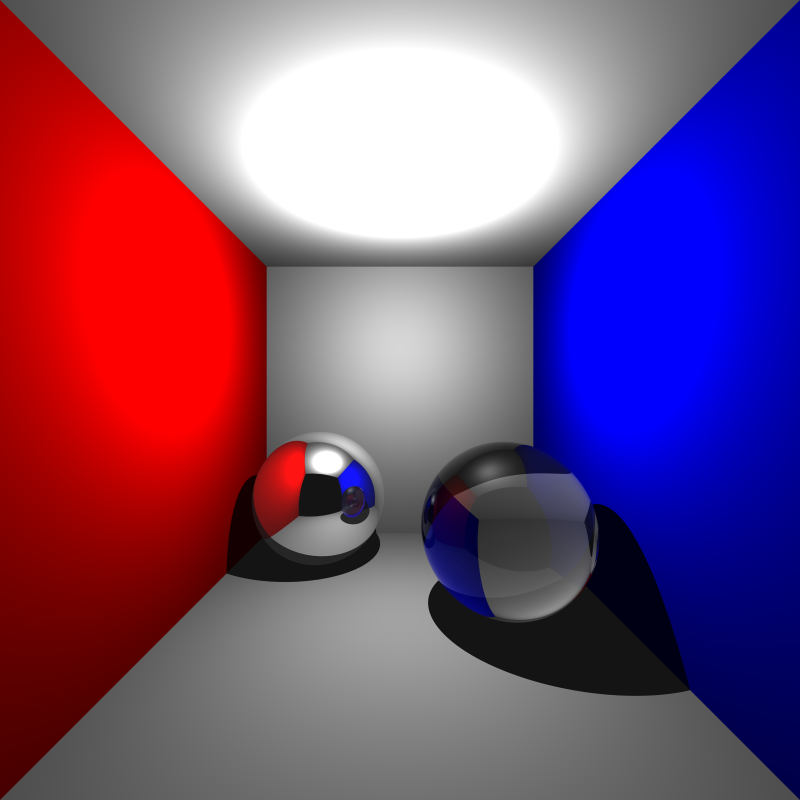
cornellbox_glass.xml
(800x800)
33.5 seconds (/w 8 thread, 100 MSAA samples / pixel)
As seen in the image above, shadows of the transparent objects are not yet handled as transparent in my ray tracer. Every object casts opaque shadow.
When I rendered the METU Glass Science Tree scene, I have seen that there are some problems in my implementation with the transparent meshes consisting of triangles. The difference of my rendered image and the professor’s rendered image is shown in the GIF below:
Here is my rendered image (click on it to see in full-size):
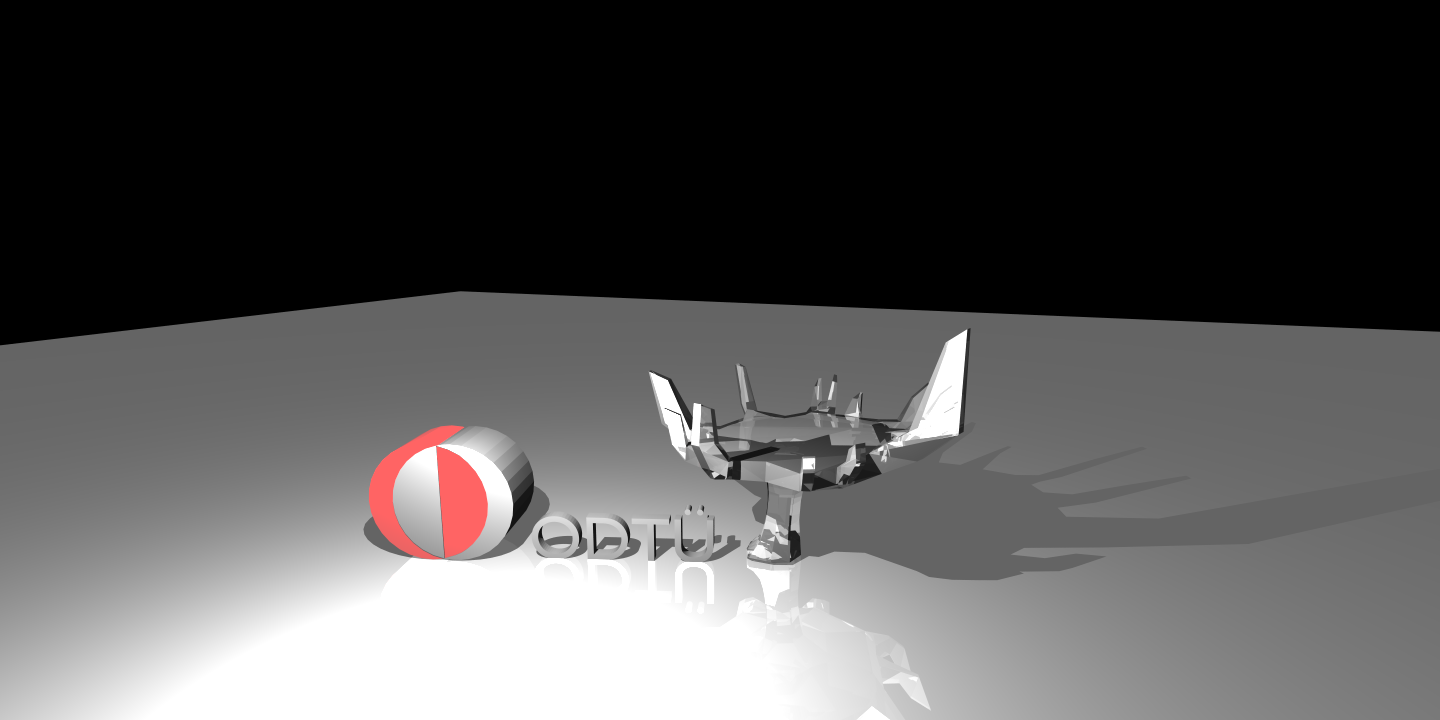
As seen in the GIF and PNG files above, my rendered image seems to have problems with the internal reflections of the refracted rays.
After consulting about this problem to my friends in the class, and also to my professor, I have spent a good amount of time (already spent days before consulting; that’s why I have submitted my assignment one week late ) to figure out where this problem stems from. I checked the reflection & refraction rays’ direction generation formula and position bias, rewrote the Schlic’s approximation calculation, disabled lights for internal hits to prevent unwanted inner color computation, and debugged 1 erroneous pixel by disabling all other pixels to see what happens during this eye ray’s lifetime. Up to this time, I couldn’t correctly identify the source of the problem, but slightly improved the transparency of the rendered image. I am still working on this problem, as when I fix it, I will be able to use transparency capability in the future assignments correctly.
That’s the end of the second part of our adventure. Hope to see you in the third part!
Happy tracing!
Amazing post! Very detailed and instructive for anyone reading this. The minor bug is not very critical at this point but it would be good to understand what is causing that.